Penny Wall Tutorial
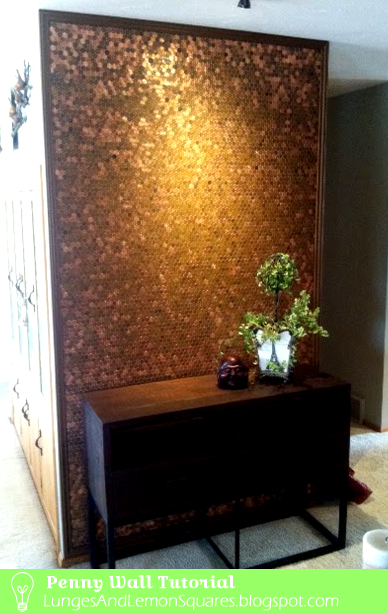
As tedious as it seems, we has such a fun time making the penny wall! It turned out far better than we had expected! In a nutshell, this is how we made it.
Materials
- 3/8” Plywood
- Liquid Nails Epoxy (Approx. 8 tubes)
- Goof Off!
- Pennies!
- Molding
- Metallic Paint (for molding)
- Screws
- Finishing Nails
Tools
- Drill
- Hammer
- Hands
This project pretty much started like this;
“Lucy, I am going to make a penny wall on that space next to the dining table”
“…Ok!”.…and off we went to The Home Depot. Clearly a lot of planning went into this. So we picked up our plywood and decided it would have to be thick enough to sustain the weight of the pennies – we got a piece that was 3/8” thick. Wally the wood guy was nice enough to cut it to size for us.
The area of the wall we covered was 50” wide by whatever the height is from the floor to the ceiling. After a quick chat with our favorite paint guy Rick, we decided on a tube of Clear Liquid Nails Adhesive – more on that later.

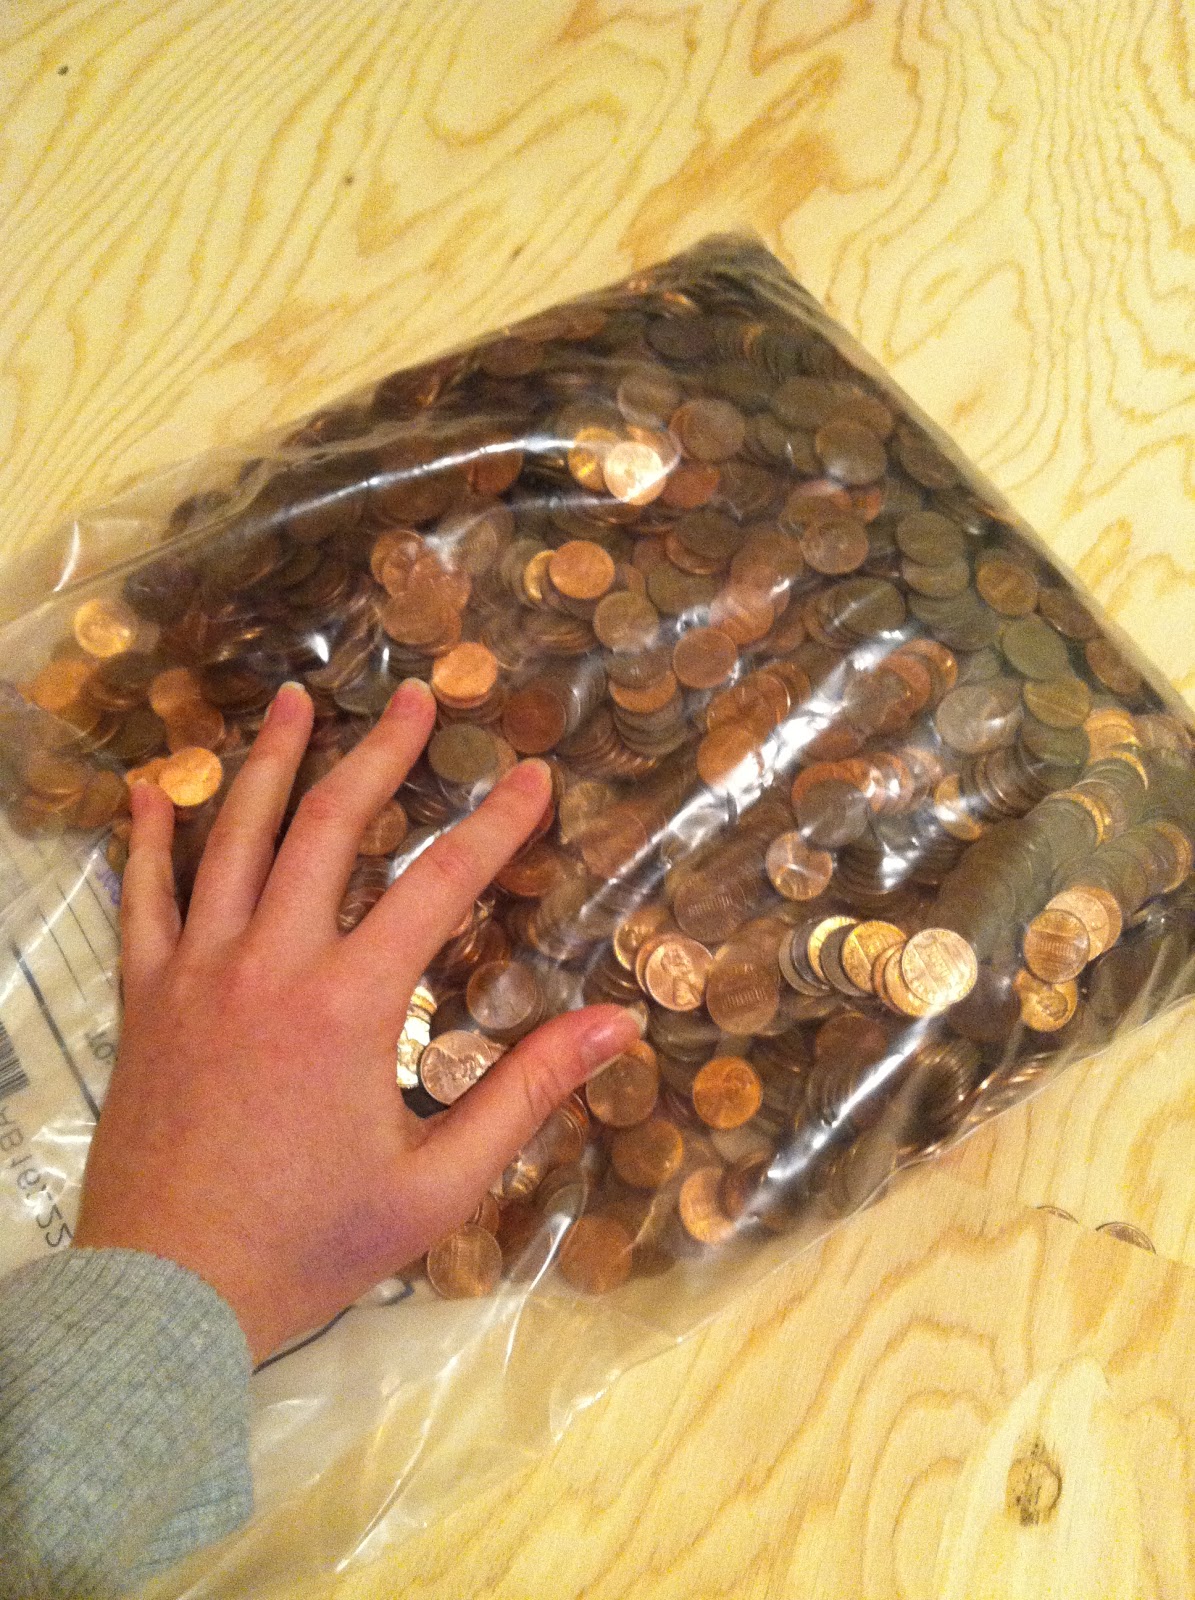
We were told by our resident expert engineer (Father In Law) that the best way to start laying down the pennies was to start up one side, so we did. You know, sometimes engineers over analyse; even though we started it out this way, we ended up just creating simple rows from the bottom and built up.

Back to that glue... we started globbing each individual penny with a spot of glue until Barb had a stroke of genius to just spread the glue across the board in neat rows (duh). It went much quicker from there on. The coins were all placed randomly head and tails side up and we didn’t polish any of the coins as we wanted a cool palette of coppers :) We were also very careful to eliminate any Canadian pennies that got mixed in with our GIANT bag of ‘Murican pennies :P. Use a ruler or piece of straight wood to ensure your penny lines are straight. We drew a straight line across the board about every 10 rows, just to make sure we weren't going wonky.


Just a tip while you are sticking pennies, wipe excess glue as you go. Even though the glue dries clear, once it’s up on the wall you can see little globs sticking out. We just picked them off :) very professional, yes I know.
Barb painted the molding/frame with some Martha Stewart metallic paint and set it to dry as the penny wall was screwed into the wall. A little bit of patience for the molding to dry and up it went... and voila! The penny wall was complete, don’t you agree it looks absolutely gorg!?

How much would you guess we used in pennies? :)
Upgrade your construction projects with Hey Concrete’s premium concrete wall panels engineered for strength, durability, and modern design. As a leading manufacturer in India, we offer versatile panels suitable for any space. Order online for fast, reliable delivery and transform your interiors or exteriors today. For more visit our website today or contact- 8107719987
ReplyDelete